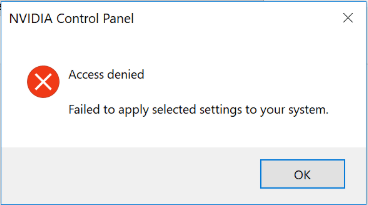
 Иногда при изменении параметров в панели управления NVIDIA вы можете получить сообщение об ошибке: Доступ запрещен, не удалось применить выбранные настройки к системе. Как правило, эта ошибка возникает при настройках параметров 3D и, в частности, выборе предпочтительного графического процессора (видеокарты) в разделе «Глобальные параметры» или «Программные настройки».
В этой инструкции подробно о том, как исправить ошибку «Доступ запрещен» в панели управления NVIDIA в Windows 10 и предыдущих версиях системы. Напоминаю, что в Windows 10 вы можете изменить видеокарту по умолчанию в параметрах системы.
- Простые способы исправить ошибку Доступ запрещен в панели управления NVIDIA
- Дополнительные методы
- Видео инструкция
Как исправить ошибку

Прежде чем приступать, рекомендую выполнить простую перезагрузку вашего компьютера или ноутбука, причём в случае Windows 10 использовать именно пункт «Перезагрузка», а не завершение работы с последующим включением.
Простые способы решения «Доступ запрещен» в панели управления NVIDIA
Если предыдущий метод не сработал, то следующий простой вариант — заняться приложением NVIDIA Control Panel:
- Если у вас Windows 10, то зайдите в Параметры — Приложения, найдите NVIDIA Control Panel в списке «Приложения и возможности», нажмите по приложению и в разделе «Дополнительные параметры» попробуйте использовать кнопки «Исправить» и «Сбросить» для сброса приложения. Также можно попробовать запуск панели управления NVIDIA от имени администратора: находим приложение в меню «Пуск», правый клик — дополнительно — запуск от имени администратора.

- В предыдущих версиях Windows попробуйте перейти в C:Program FilesNVIDIA CorporationControl Panel Client и запустить nvcplui.exe от имени администратора (Как запустить игру или программу от имени администратора).
- Перейдите в папку C:ProgramDataNVIDIA Corporation (можно ввести путь в адресную строку проводника и нажать Enter), затем нажмите правой кнопкой мыши по папке Drs и выберите пункт «Свойства». Проверьте, есть ли доступные предыдущие версии этой папки на вкладке «Предыдущие версии», если есть — восстановите предыдущую версию.
- Если это не помогло, откройте папку Drs, выберите в ней файлы, имена которых начинаются с nvdrs и имеют расширение .bin. Переместите эти файлы в другое расположение (не торопитесь удалять), а затем перезагрузите компьютер.

- В Windows 10 можно также попробовать удалить приложение NVIDIA Control Panel (в Параметры — Приложения и возможности), а затем снова установить его из Microsoft Store.


Дополнительные методы
Дальнейшие действия имеют отношения к драйверам видеокарты NVIDIA и тоже могут сработать при рассматриваемой проблеме:
- В случае, если проблема возникла после обновления драйвера NVIDIA, попробуйте откатить его: зайдите в диспетчер устройств (Win+R — devmgmt.msc), откройте свойства видеокарты NVIDIA GeForce, и, если кнопка «Откатить» на вкладке «Драйвер» активна, используйте её.
- Попробуйте скачать драйверы вашей видеокарты NVIDIA с сайта nvidia.ru или с сайта производителя ноутбука (первый вариант предпочтительнее), а после запуска установщика выбрать пункт «Выборочная установка», а затем отметьте пункт «Выполнить чистую установку». После завершения установки перезагрузите компьютер и проверьте, сохраняется ли ошибка «Доступ запрещен. Не удалось применить выбранные настройки к системе».

- Попробуйте использовать точки восстановления системы на дату, когда проблемы не проявляла себя: это восстановит, в том числе, драйверы NVIDIA и относящиеся к управлению графикой параметры в реестре. Подробнее: Точки восстановления Windows 10.
- С осторожностью (изображение может пропасть и не появиться до перезагрузки компьютера): удалить видеокарту NVIDIA в диспетчере устройств, а затем в меню «Действие» обновить конфигурацию оборудования.

И ещё несколько пунктов, не относящиеся к драйверам, но, возможно, способные восстановить работоспособность настроек панели управления NVIDIA:
- По отзывам некоторых пользователей, в их случае помогла проверка системного диска с помощью chkdsk: запустите командную строку от имени администратора, введите команду chkdsk C: /f и нажмите Enter, а после завершения процесса проверьте, изменилась ли ситуация.
- Теоретически, сторонние программы, такие как антивирусы или средства очистки памяти также могут послужить причиной появления ошибки «Доступ запрещён». Если недавно устанавливалось что-то подобное, попробуйте отключить или удалить такое ПО.
- Попробуйте выполнить проверку целостности системных файлов Windows.
Видео инструкция
Надеюсь, один из предложенных методов поможет в вашем случае и решить проблему.
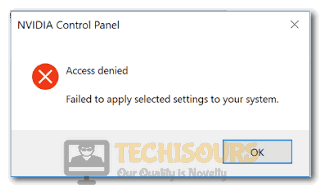
Nvidia Control Panel has been around for quite some time now and it really conveniences the user by allowing them to download and keep their drivers up to date. However, some users have been getting the Nvidia Control Panel Access Denied Message that says “Failed to apply Selected Settings to your System” whenever they try to open it up and change some settings on it. This is a very annoying issue and is most likely caused by a glitched driver being sent out by Nvidia.
In this article, not only have we addressed the root cause of this issue, but we have also listed the specific reasons that some users might see this error message on their screens. In addition to that, we have provided solutions that we could find from all users that managed to fix this issue. Follow along the below-mentioned methods to completely fix the Nvidia Control Panel Access denied error.
What Causes the Access Denied Message on Nvidia Control Panel?
After carefully studying the user feedback, we came to the conclusion that the following must be the paramount reasons due to which the error message is being triggered.
- Display Driver Service: It is possible that on your computer, the Display Driver service might not have been configured properly due to which the error message is being triggered. Therefore, we suggest that you try and enable this service from the service management window and then check to see if doing so fixes the Nvidia Control Panel Access Denied message.
- Outdated Drivers: In certain cases, the drivers installed on the system might have been outdated or they might not be configured properly. Therefore, we suggest that you try and update your drivers and then check to see if doing so would fix this error.
- Incorrect Driver Installation: If you have recently installed the drivers on your system, we strongly suggest that you try and reinstall them after completely removing the older ones as mentioned in the solutions below because this can sometimes cause the error message.
- Glitchy Drivers from Nvidia: Nvidia is sometimes not so careful with driver releases and it is possible that they have released drivers that aren’t fully prepared for all sorts of different hardware combination. Therefore, we suggest that you try and replace the drivers installed with older ones that might work with your system more effectively.
Now that you have studied the primary reasons behind its occurrence, we can finally start implementing the solutions that will fix this issue for you.
Solution 1: Restart Nvidia Display Driver Service
- Press the “Windows + R” keys on your keyboard, type in “services.msc” and press “Enter” to launch into the services management window.

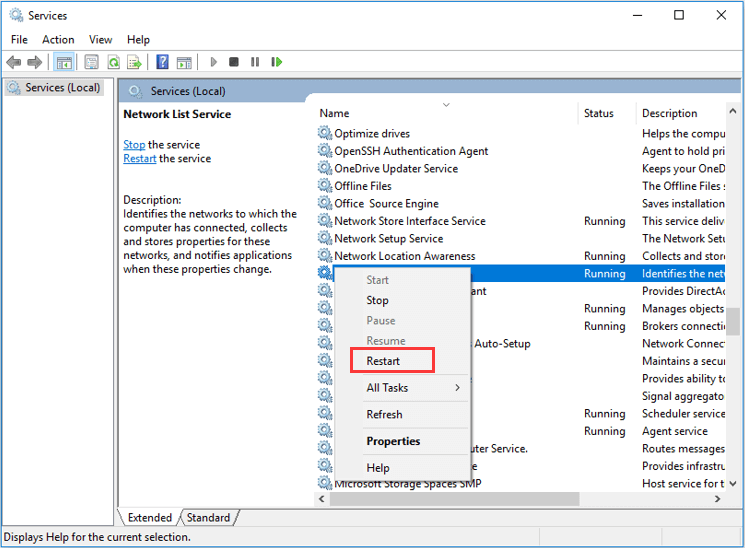
Typing in “services.msc” - Now look for the “Nvidia Display Drivers” service and right-click on it to select the “Restart” option.
- Again right-click on the “Nvidia Display Driver” service and select “Properties”.
- Then select “Automatic” from the drop-down list of “Startup Type”.

Selecting Automatic from the Startup Type - Lastly, check if the error got fixed now.


Solution 2: Restart the Nvidia Control Panel
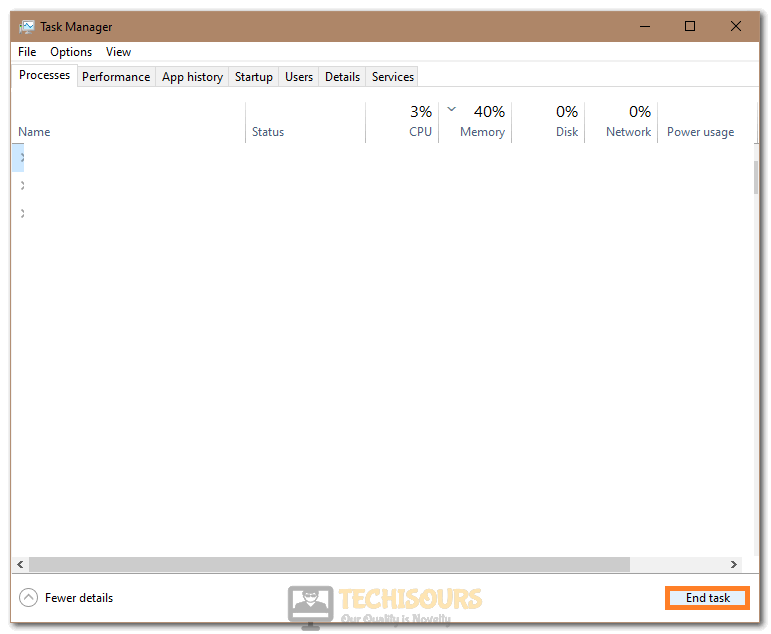
- Open your PC, right-click on the taskbar and select “Task Manager” from the menu.

Open Task Manager - Inside the task manager, look for the “Nvidia Control Panel” task and click on it to select and highlight it.
- After doing that, click on the “End Task” button at the bottom right side of your screen and the task will be ended.

Clicking on the “End Task” button - Check to see if doing so fixes the Nvidia Control Panel Access Denied message on your computer.

Solution 3: Update Nvidia Drivers
- Right-click on the “Windows” logo on the left side of the taskbar and from the menu click to select “Device Manager”.

Open Device Manager - Click on the “Display Adapters” options to expand them. After that, right-click on the Nvidia GPU inside that list and select the “Update Drivers” option.
- On the next screen, select “Search automatically for the drivers”. This will search and update the driver automatically.
- If this doesn’t work then download any driver update like “Driver Easy” or another. Install that software and follow the on-screen instructions to detect if any updates are required or not. After that click on “Update All”.

Update Drivers - After the drivers are updated, check to see if doing so has fixed the Nvidia Access Denied error on your computer.


Solution 4: Install Nvidia Drivers For Desktop
- Right-click on the “Windows” logo at the bottom left side and from the drop-up menu click to select “Device Manager”.
Open Device Manager - From here, click on the “Display Adapters” dropdown to expand it and right-click on the GPU installed on your computer.
- After that, select the “Uninstall Device” option and follow through with the instructions on-screen to completely remove your driver.
- Next, go to the GeForce Driver Download Center and on there, utilize the “Auto-detect your GPU” option to be able to automatically download the drivers most suitable for your hardware. In addition to that, it also enables you to be able to search for the driver manually so you can enter your OS and your hardware details to get the right driver.
- After the download of the driver has completed, run the executable and go through the initial on-screen option and select the “Perform a clean installation” option when it is presented. From there, click on the “Next” button to automatically install the drivers on your computer.

Checking the “Perform a Clean Installation” button

Note: If that doesn’t work, we recommend using DDU to completely remove the GPU and Sound Drivers from your computer. After doing that, navigate to the Geforce Driver Download Center and from there, download and install an older version of your driver to fix the error message.
Solution 5: Run Nvidia Control Panel As Administrator
- Open “File Explorer” by pressing the “Windows + E” keys at the same time.
- Here go to the following path:
C:Program FilesNVIDIA CorporationControl Panel Client
- Now, look for the file named “nvclui.exe” and right-click on it to select “Properties”.
- Go to the “Compatibility” tab and select the “Run this program as an administrator” option.
- Finally, click “OK” to save the changes.
Solution 6: Restore Drivers
- Open “File Explorer” by pressing the “Windows” and “E” keys at the same time.
- Now go to the following path:
C:ProgramDataNVIDIA CorporationDRS
- Next, locate the “ProgramData”, if you can not see it then you have to unhide files. You can do this by going to the “View” tab and selecting “Show hidden items” from the “Show/Hide Section”.

View hidden items - Right-click on the “DRS” folder and select “Properties” from the drop-down menu.
- Now go to the “Previous Versions” tab and select a recent date when the “Nvidia Control Panel” was working fine.
- Click on “Reset” and next follow the on-screen instructions to reset it.
- Then check if the error got removed.

Solution 7: Disable Games Bar
- Press the “Window + I” keys at the same time to open up the “Settings” window.
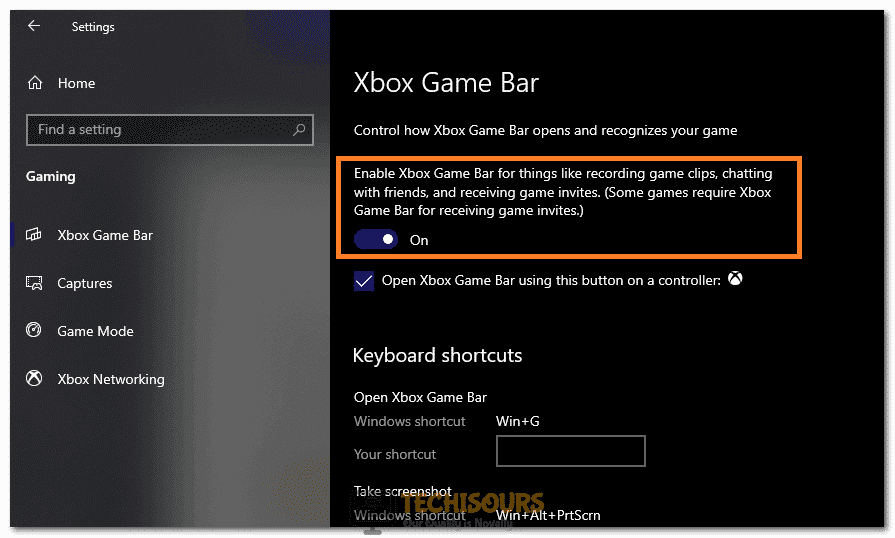
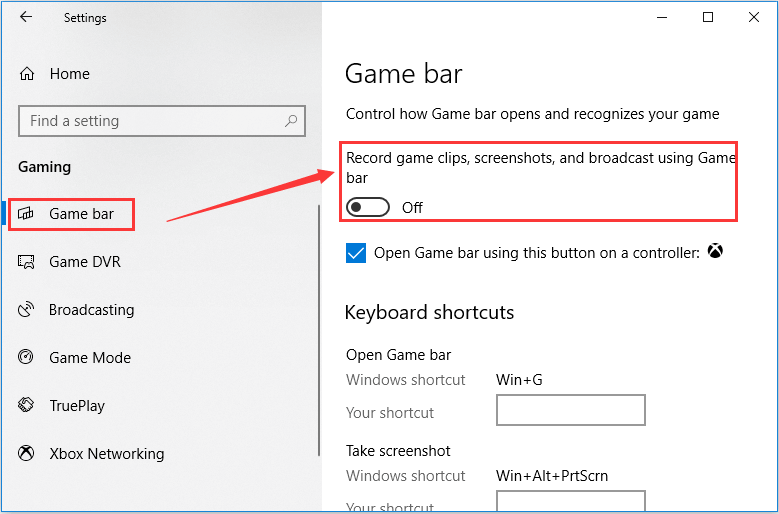
- Now select the “Gaming” option and go to the left menu pane to select “Xbox Game Bar”.

Turning Game Bar Toggle Off - Then toggle the switch “OFF” to disable the games bar.
- Check to see if doing so fixes the Nvidia Control Panel Access Denied error.
Solution 8: Set Power Management Mode to Maximum Performance
- First, uninstall and then “Reinstall” the Nvidia Drivers by following the “Solution 4” given above.
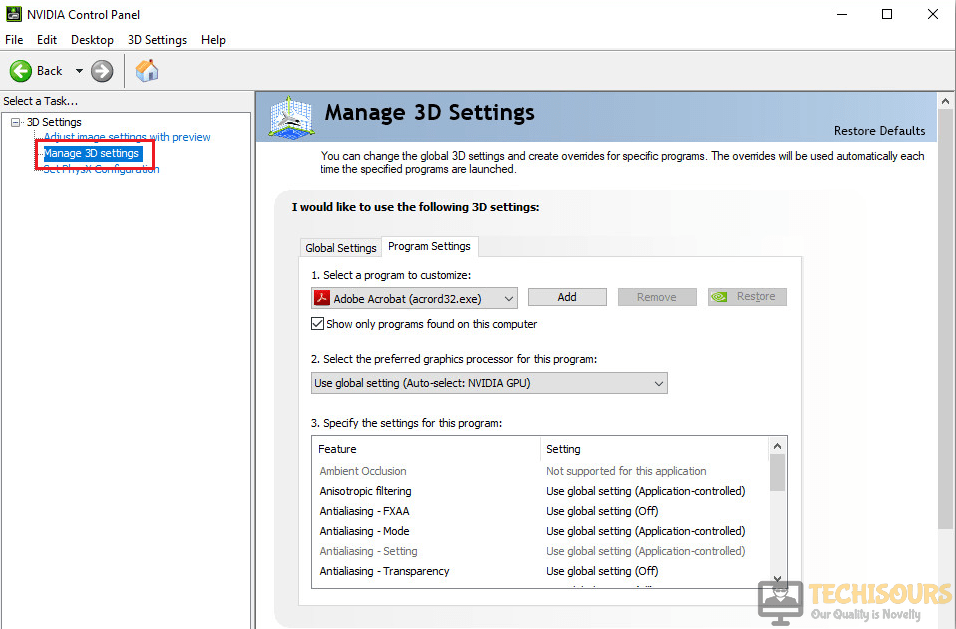
- Go to the “Nvidia Control Panel” and click on “Manage 3D settings”.

Manage 3D Settings - Next, go to the “Power Management mode” and set it to “Prefer maximum performance”.
- Also set “PhysX Configuration” to your specific card.
- Now check if the Nvidia Control Panel Access Denied error got resolved.
Hopefully, the list of fixes mentioned above will help you solve the error easily but in case it still persists then feel free to Contact Us here.

Alan is a hardcore tech enthusiast that lives and breathes tech. When he is not indulged in playing the latest video games, he helps users with technical problems that they might run into. Alan is a Computer Science Graduate with a Masters in Data Science.
Contents
- Solution 1: Updating your NVIDIA Graphics Driver
- Use the Device Manager
- Download the Driver from the Manufacturer’s Website
- Use Auslogics Driver Updater
- Solution 2: Reinstalling Your NVIDIA Graphics Driver
- Solution 3: Running the NVIDIA Control Panel as an Administrator
- Solution 4: Restarting Your NVIDIA Display Driver Service
- Solution 5: Restarting the NVIDIA Control Panel Process
- Solution 6: Restoring the Working Version of the Driver
- Solution 7: Disabling Games Bar

For people who use their computers for editing videos or playing games, it is crucial that they have access to the NVIDIA Control Panel. It is important for them to have the ability to configure their graphics settings. However, there are instances wherein this utility starts to malfunction, making certain features inaccessible. You probably found this article because of the error message below:
“NVIDIA Control Panel Access Denied.”
Now, you might ask, “Why can’t I access my NVIDIA Control Panel?” There are various reasons why this issue shows up. It is possible that your drivers are outdated. On the other hand, if you’ve recently updated your drivers, then it is possible that the installation is corrupted or damaged. You should also check if you are running the NVIDIA Control Panel as an administrator. Sometimes, the error message appears when the user does not have administrative privileges to perform changes on the NVIDIA Control Panel.
Whatever the root cause of the issue may be, we’ve got you covered. Keep on reading this post, and we will teach you how to fix the ‘Access Denied – Failed to apply selected setting to your system’ error.
Solution 1: Updating your NVIDIA Graphics Driver
You might wonder, “Why has my NVIDIA Control Panel stopped working?” As we’ve mentioned, this is likely a driver-related problem. So, we recommend that you update your NVIDIA graphics card driver. There are three ways to do this:
- Use the Device Manager
- Download the Driver from the Manufacturer’s Website
- Use Auslogics Driver Updater
Use the Device Manager
- Go to your taskbar, then right-click the Windows icon.
- Select Device Manager from the options.
- Once the Device Manager is up, expand the contents of the Display Adapters category.
- Right-click your NVIDIA graphics card from the list, then select Update Driver from the context menu.
Download the Driver from the Manufacturer’s Website
While using the Device Manager is convenient for updating your drivers, the tool can be unreliable at times. It can miss the latest version for your driver. So, you might still need to download and install the NVIDIA graphics card driver manually. To do this, you need to go to NVIDIA’s website, then search for the latest driver that is compatible with your operating system version and processor type. After downloading the driver, double-click the file and follow the instructions to complete the installation process.
Use Auslogics Driver Updater
As you can see, you’ll need a lot of patience, computer skills, and time to update your NVIDIA graphics card driver manually. Thankfully, there is an easy, reliable, and safe way to do this. You can use Auslogics Driver Updater to update your NVIDIA graphics driver along with other drivers on your PC.
After installing Auslogics Driver Updater, the tool will recognize your operating system and processor type automatically. It will look for the latest driver NVIDIA recommends for your computer. You do not have to worry about downloading and installing an incompatible driver. The best part is, Auslogics Driver Updater will resolve all driver-related issues on your PC. So, once the process is complete, you will enjoy an overall improvement in your computer’s performance.
Solution 2: Reinstalling Your NVIDIA Graphics Driver
If updating your graphics card driver does not get rid of the error message, we recommend that you reinstall the driver completely. It is possible that its installation files have been corrupted. So, you need to remove the residual files before reinstalling the driver. Follow the steps below to proceed:
- On your keyboard, press Windows Key+X.
- Select Device Manager from the options.
- Now, click Display Adapters to expand its contents.
- Right-click your NVIDIA graphics card, then choose Uninstall Device from the context menu. Once you’ve done this, your graphics driver will be removed from your computer.
- Restart your PC, then open File Explorer by pressing Windows Key+E on your keyboard.
- Navigate to the following folder locations:
C:Program Files (x86)
C:Program Files
- Remove all NVIDIA folders from these locations.
- Use Auslogics Driver Updater to reinstall your NVIDIA graphics card driver.
After reinstalling your graphics card driver, try running the NVIDIA Control Panel again to see if the error message is gone.
Solution 3: Running the NVIDIA Control Panel as an Administrator
You might still wonder, “Why does the NVIDIA Control Panel not open on Windows 10?” It is possible that you are running the program without appropriate permissions. So, we suggest that you launch the NVIDIA Control Panel with administrative privileges to resolve the error. Here are the steps:
- Launch File Explorer by pressing Windows Key+E on your keyboard.
- Now, navigate to this path:
C:Program FilesNVIDIA CorporationControl Panel Client
- Look for the nvcplui.exe file, then right-click it.
- Select Properties.
- Go to the Compatibility tab, then make sure you select the ‘Run this program as an administrator’ option.
- Click OK to save the changes you made.
- Right-click the nvcplui.exe file, then select Run as Administrator.
Solution 4: Restarting Your NVIDIA Display Driver Service
It is possible that your NVIDIA Display Driver service is not working, which can also be the reason why its Control Panel is not functioning either. So, you need to restart your NVIDIA Display Driver service to get the Control Panel to work properly. Follow the instructions below:
- Open the Run dialog box by pressing Windows Key+R on your keyboard.
- Inside the Run dialog box, type “services.msc” (no quotes), then click OK.
- Look for the NVIDIA Display Driver service, then right-click it.
- Select Restart from the options.
- Right-click the NVIDIA Display Driver service once more, then select Properties.
- Click the drop-down list beside Startup Type, then choose Automatic.
- Click OK to save the changes you’ve made.
- Now, try opening your NVIDIA Control Panel and check if you have access to all the features.
Solution 5: Restarting the NVIDIA Control Panel Process
In some cases, all it takes is a simple restart of the NVIDIA Control Panel process to get the tool working properly. Here are the steps:
- Open the Task Manager by pressing Ctrl+Shift+Esc on your keyboard.
- Expand the contents of the NVIDIA Control Panel section.
- Right-click NVIDIA Control Panel, then click End Task.
Now, try opening your NVIDIA Control Panel and check if the error is gone.
Solution 6: Restoring the Working Version of the Driver
If you are using System Restore or System Protection on your Windows computer, then it is likely that an older, working version of the NVIDIA graphics card driver is still stored on your device. You can try accessing it and restoring it to get rid of the issue. However, keep in mind that this method only works if your files are backed up. Follow the steps below:
- Press Windows Key+E on your keyboard to launch File Explorer.
- Click This PC from the options on the left, then navigate to the path below:
C:ProgramDataNVIDIA CorporationDRS
- Note: If you cannot see the ProgramData folder, then you need to reveal the hidden files. You can do this by going to the View tab and selecting Hidden Items in the Show/Hide section.
- Right-click the DRS folder, then choose Properties from the options.
- Go to the Previous Versions tab, then look for different folder versions. Select a recent date when the NVIDIA Control Panel issue did not exist yet.
- Click Reset, then follow the on-screen instructions.
After performing the steps above, try opening your NVIDIA Control Panel again and check if the issue has been resolved.
Solution 7: Disabling Games Bar
A built-in Windows utility, Game Bar is designed to improve a user’s gaming experience. Once you update your operating system, it will be enabled automatically. However, there are times when it interferes with the NVIDIA Control Panel. So, to get rid of the problem, you can try disabling it. Follow the instructions below:
- Open the Settings app by pressing Windows Key+I on your keyboard.
- Select Gaming.
- Go to the left-pane menu, then select Game Bar.
- Move to the right pane, then toggle the switch to Off.
Try running the NVIDIA Control Panel again and check if the ‘Access Denied’ error is gone.
What other PC gaming issues would you like us to resolve?
Feel free to ask your questions in the comments below!
Download PC Repair Tool to quickly find & fix Windows errors automatically
The NVIDIA Control Panel is a central control panel for devices that run the NVIDIA Graphics Drivers. It comes bundled with the driver package itself and hence does not need to be downloaded or updated separately. Some users have been reporting that when they are making changes to the configuration inside the NVIDIA Control Panel, it throws out the Access denied error. The whole error reads,
Access denied.
Failed to apply selected settings to your system.
In this article, we will learn how to fix it.

Some of the practical methods to effectively fix the Access denied error for NVIDIA Control Panel is as follows:
- Run the nvcplui.exe file as an Administrator.
- Restore the most recent version of its folder.
- Update or Rollback drivers.
1] Run the nvcplui.exe file as an Administrator
Open File Explorer and navigate to the following path:
C:Program FilesNVIDIA Corportation Control Panel Client
Locate a file called nvcplui.exe, right-click on it and select Run as administrator.
Select Yes for the UAC or the User Account Control alert you get.
This should fix your issues.
2] Restore the most recent version of its folder
It is a tricky method, so follow the steps carefully.
- Open the File Explorer
- Navigate to the following path: C: ProgramData NVIDIA DRS.
- Right-click on the folder of DRS and Select Properties.
- Switch to Previous Versions, System Protection or System Restore inside the Properties window.
- Restore the most recent version of the contents of that folder.
It should revert the old working DRS configuration. Your issue must be fixed now.
Read: NVIDIA Control Panel missing on Windows
3] Update or Rollback drivers
First, you need to uninstall the current version of installed NVIDIA Graphics drivers from your computer. Next, download and install the latest version of the driver from NVIDIA’s official download page.
We did this method instead of directly updating the driver because we have to reset all the configuration of the driver stored on that computer.
Alternatively, you can try to roll back the current version of the driver and check if that fixes your issue.
It should have helped you.
You can set the quality and other aspects of the displayed elements that are powered by the Graphics Card using this tool. It helps in customizing the strain on the hardware to produce the best fit of elements for the user.
Related read:
- NVIDIA Control Panel not opening
- NVIDIA Control Panel keeps crashing.
Ayush has been a Windows enthusiast since the day he got his first PC with Windows 98SE. He is an active Windows Insider since Day 1 and has been a Windows Insider MVP.
If you are trying to make changes to the settings in your NVIDIA Control Panel but receiving NVIDIA Control Panel access denied error message, you are at the right place. In this post, MiniTool solution will show you how to fix this NVIDIA access denied error with 5 simple methods.
About Access Denied NVIDIA Control Panel
According to the reports of NVIDIA users, sometimes they open NVIDIA Control Panel but cannot apply changes made for its configuration. And a notification window will pop-up, showing NVIDIA Control Panel access denied, failed to apply selected settings to your system.
In most cases, this error occurs when users are trying to change settings in the Manage 3D Settings, or set the default graphics processor for a game on their computers. The reasons for the error can be different in different cases, but the common ones should be NVIDIA driver issue and administrative privilege issue.
Well, let’s see how to fix this access denied NVIDIA Control Panel issue effectively and quickly.
Fix 1: Update, Rollback or Clean Install NVIDIA Driver
The outdated or broken NVIDIA driver should be responsible for NVIDIA access denied issue in some cases. Some users have fixed it by updating, rollbacking or clean installing their drivers. So, you can feel free to have a try according to your needs.
At first, you should press Windows + R to open Run window, and input devmgmt.msc and click OK to open Device Manager.
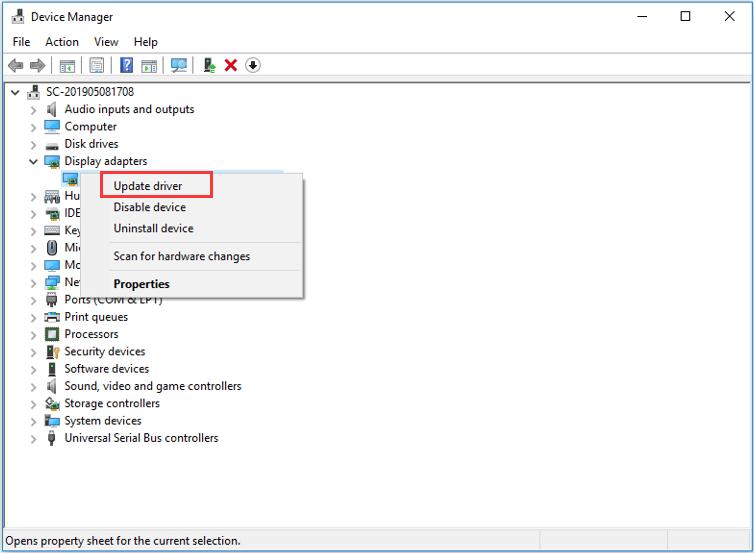
To update NVIDIA driver, just expand Display adapter, right-click your driver and click Update driver. Then, choose Search automatically for updated driver software and follow the onscreen instruction to complete the process.
Note: You can also download the latest driver from the manufacturer’s website and install it manually.
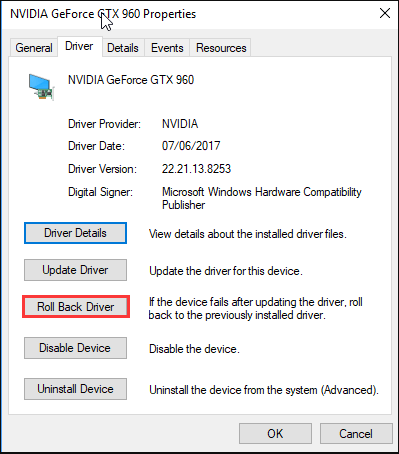
To rollback NVIDIA driver, you should right-click the drive, choose Properties, and click Roll Back Driver under Driver tab of the new window.
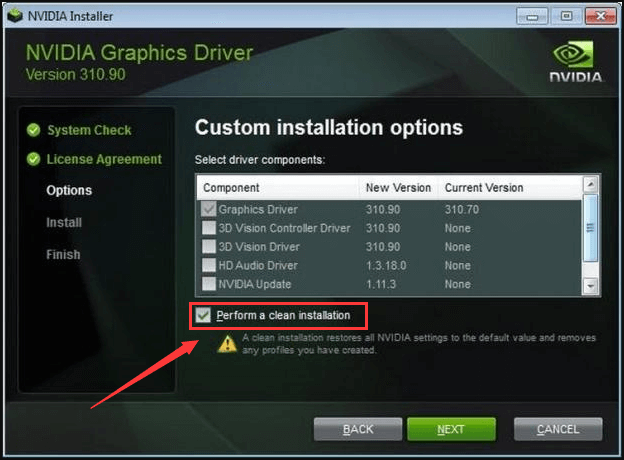
To clean install NVIDIA driver, you should right-click the driver and click Uninstall device to uninstall the driver at first. Then, download your needed driver from the official website and install it according to the given instructions. Just notice that you need to check Perform a clean installation when you get the following window.
Fix 2: Run NVIDIA Control Panel as Administrator
As for the administrator privilege issue, you just need to run your NVIDIA Control Panel.
To do that, just follow the steps below:
Step 1: Open File Explorer.
Step 2: Navigate to the path C:Program FilesNVIDIA Corportation Control Panel Client and locate a file named nvcplui.exe.
Step 3: Right-click the file and select Run as administrator. When you get any confirmation dialog, click Yes to continue.
Now, you can make changes for your NVIDIA Control Panel again to see if these changes can be applied. If this method fails to fix NVIDIA access denied issue, you can try the next method.
Fix 3: Restart NVIDIA Display Driver Service
Your NVIDIA Control Panel failed to apply selected settings to your system might also because the NVIDIA Display Driver service is not working. In this case, you can try restarting the service to fix the error.
Step 1: After invoking Run window, input services.msc and click OK to open Services.
Step 2: Locate NVIDIA Display Driver service. Right-click it and choose Restart.
Step 3: Besides, you need to double-click the service to open its Properties window. Then, set its Startup Type as Automatic and click OK to save the change.
Fix 4: Disable Game Bar
The Game Bar is a feature provided in Windows to improve gaming experience and it is enabled automatically. However, it is proven that it can interfere with the NVIDIA Control Panel. Hence, you can try disabling Game Bar to resolve NVIDIA access denied issue.
Step 1: Press Windows + I to open Windows Settings.
Step 2: Choose Gaming in the main interface.
Step 3: Click Game bar in the left pane, and toggle off the switch button of Game bar.
After that, you can run your NVIDIA Control Panel again to check if the access denied issue is fixed.
Fix 5: Restore the Most Recent Working Version of Its Folder
If you are using System Restore or System Protection on your Windows PC, the previous working version of your NVIDIA driver folder might still be saved on your hard drive. Thus, you can try restoring this working version to fix NVIDIA Control Panel access denied issue.
Step 1: Open your File Explorer, switch to View tab and check Hidden items to show all the hidden files and folders.
Step 2: Navigate to the following path: C:ProgramDataNVIDIA CorporationDRS.
Step 3: Right-click the DRS folder and choose Properties.
Step 4: In the pop-up dialog, go to Previous Versions tab and choose a folder version that created before the NVIDIA issue occurs.
Step 5: Click Reset button and follow the on-screen instruction to complete the process.
Once it’s done, you should be able to make changes for your NVIDIA Control Panel without any problems.