Contents
- Introduction
-
The Basics
- Locating Files by Name
- Locating Files by Size
- Locating Files by Access Time
-
Advanced Usage
- Combining Searches
- Acting On The files
- Using xargs
- More Information
Introduction
The GNU find command searches files within a directory and its subdirectories according to several criteria such as name, size and time of last read/write. By default find prints the name of the located files but it can also perform commands on these files.
The GNU find command is part of the GNU findutils and is installed on every Ubuntu system. findutils is actually made up of 4 utilities:
-
find — search for files in a directory hierarchy, whether its a database or not
-
locate — list files in databases that match a pattern, i.e. find inside updatedb’s list
-
updatedb — update a file name database, i.e. collection of db’s only, such as sqlite
-
xargs — build and execute command lines from standard input — usually you do this directly w/o xargs
This wiki page will be only be dealing with find while also briefly mentioning xargs. Hopefully locate and updatedb will be covered on their own page in the near future. «find», like «locate», can find database-files as well, but «locate» is more specialized for this task. You would run updatedb before using locate, which relies on the data produced by «updateDB».
The Basics
find ~ -name readme.txt
will find this file below the home directory. find works incredibly fast on the second run! You can search the whole / root-dir-tree in a mere approx. 3 seconds (on second run, when cache is effective) on a 500 GB ext4-fs hard disk.
The syntax for using find is:
find [-H] [-L] [-P] [path...] [expression]
The 3 options [-H] [-L] [-P] are not commonly seen but should at least be noted if only to realise that the -P option will be the default unless another option is specified:
- -H : Do not follow symbolic links, except while processing the command line arguments.
- -L : Follow symbolic links.
- -P : Never follow symbolic links: the default option.
The option [path…] refers to the particular location that you wish to search, whether it be your $HOME directory, a particular directory such as /usr, your present working directory which can simply be expressed as ‘.’ or your entire computer which can be expressed as ‘/’.
The option [expression] refers to one or a series of options which effect the overall option of the find command. These options can involve a search by name, by size, by access time or can also involve actions taken upon these files.
Locating Files by Name
The most common use of find is in the search for a specific file by use of its name. The following command searches the home directory and all of its subdirectories looking for the file mysong.ogg:
find $HOME -name 'mysong.ogg'
It is important to get into the habit of quoting patterns in your search as seen above or your search results can be a little unpredictable. Such a search can be much more sophisticated though. For example if you wished to search for all of the ogg files in your home directory, some of which you think might be named ‘OGG’ rather than ‘ogg’, you would run:
find $HOME -iname '*.ogg'
Here the option ‘-iname’ performs a case-insensitive search while the wildcard character ‘*’ matches any character, or number of characters, or zero characters. To perform the same search on your entire drive you would run:
sudo find / -iname '*.ogg'
This could be a slow search depending on the number of directories, sub-directories and files on your system. This highlights an important difference in the way that find operates in that it examines the system directly each time unlike programs like locate or slocate which actually examine a regularly updated database of filnames and locations.
Locating Files by Size
Another possible search is to search for files by size. To demonstrate this we can again search the home directory for Ogg Vorbis files but this time looking for those that are 100 megabytes or larger:
find $HOME -iname '*.ogg' -size +100M
There are several options with -size, I have used ‘M’ for ‘megabytes’ here but ‘k’ for ‘kilobytes’ can be used or ‘G’ for ‘Gigabytes’. This search can then be altered to look for files only that are less than 100 megabytes:
find $HOME -iname '*.ogg' -type f -size -100M
Are you starting to see the power of find, and the thought involved in constructing a focused search? If you are interested there is more discussion of these combined searches in the Advanced Usage section below.
Locating Files by Access Time
It is also possible to locate files based on their access time or the time that they were last used, or viewed by the system. For example to show all files that have not been accessed in the $HOME directory for 30 days or more:
find $HOME -atime +30
This type of search is normally more useful when combined with other find searches. For example one could search for all ogg files in the $HOME directory that have an access time of greater than 30 days:
find $HOME -iname '*.ogg' -atime +30
The syntax works from left to right and by default find joins the 2 expressions with an implied «and». This is dealt with in more depth in the section below entitled «Combining Searches».
Advanced Usage
The sections above detail the most common usage of find and this would be enough for most searches. However there are many more possibilities in the usage of find for quite advanced searches and this sections discusses a few of these possibilities.
Combining Searches
It is possible to combine searches when using find with the use of what is known in the find man pages as operators. These are
as in
find ~ -name 'xx*' -and -not -name 'xxx'
unless you prefer the cryptic syntax below (-o instead of -or)
The classic example is the use of a logical AND syntax:
find $HOME -iname '*.ogg' -size +20M
This find search performs initially a case insensitive search for all the ogg files in your $HOME directory and for every true results it then searches for those with a size of 20 megabytes and over. This contains and implied operator which could be written joined with an -a. This search can be altered slightly by use of an exclamation point to signify negation of the result:
find $HOME -iname '*.ogg' ! -size +20M
This performs the same search as before but will look for ogg files that are not greater than 20 megabytes. It is possible also to use a logical OR in your find search:
find $HOME -iname '*.ogg' -o -iname '*.mp3'
This will perform a case insensitive search in the $HOME directories and find all files that are either ogg OR mp3 files. There is great scope here for creating very complex and finely honed searches and I would encourage a through reading of the find man pages searching for the topic OPERATORS.
Acting On The files
One advanced but highly useful aspect of find usage is the ability to perform a user-specified action on the result of a find search. For example the following search looks for all ogg vorbis files in the $HOME directory and then uses -exec to pass the result to the du program to give the size of each file:
find $HOME -name '*.ogg' -type f -exec du -h '{}' ;
This syntax is often used to delete files by using -exec rm -rf but this must be used with great caution, if at all, as recovery of any deleted files can be quite difficult.
Using xargs
xargs <<< / ls
same as: ls /
xargs feeds here-string / as parameter («argument») to the ls command
When using a really complex search it is often a good idea to use another member of the findutils package: xargs. Without its use the message Argument list too long could be seen signalling that the kernel limit on the combined length of a commandline and its environment variables has been exceeded. xargs works by feeding the results of the search to the subsequent command in batches calculated on the system capabilities (based on ARG_MAX). An example:
find /tmp -iname '*.mp3' -print0 | xargs -0 rm
This example searches the /tmp folder for all mp3 files and then deletes them. You will note the use of both -print0 and xargs -0 which is a deliberate strategy to avoid problems with spaces and/or newlines in the filenames. Modern kernels do not have the ARG_MAX limitation but to keep your searches portable it is an excellent idea to use xargs in complex searches with subsequent commands.
More Information
-
Linux Basics: A gentle introduction to ‘find’ — An Ubuntu Forums guide that was incorporated into this wiki article with the gracious permission of its author.
-
Using Find — Greg’s Wiki — A very comprehensive guide to using find, along similar lines to this guide, that is well worth reading through.
-
Linux Tutorial: The Power of the Linux Find Command The amazing Nixie Pixel gives a video demonstration of find.
CategoryCommandLine
Очень важно уметь вовремя найти нужную информацию в системе. Конечно, все современные файловые менеджеры предлагают отличные функции поиска, но им не сравнится с поиском в терминале Linux. Он намного эффективнее и гибче обычного поиска, вы можете искать файлы не только по имени, но и по дате добавления, содержимому, а также использовать для поиска регулярные выражения.
Кроме того, с найденными файлами можно сразу же выполнять необходимые действия. В этой статье мы поговорим о поиске с помощью очень мощной команды find Linux, подробно разберем её синтаксис, опции и рассмотрим несколько примеров.
Команда find — это одна из наиболее важных и часто используемых утилит системы Linux. Это команда для поиска файлов и каталогов на основе специальных условий. Ее можно использовать в различных обстоятельствах, например, для поиска файлов по разрешениям, владельцам, группам, типу, размеру и другим подобным критериям.
Утилита find предустановлена по умолчанию во всех Linux дистрибутивах, поэтому вам не нужно будет устанавливать никаких дополнительных пакетов. Это очень важная находка для тех, кто хочет использовать командную строку наиболее эффективно.
Команда find имеет такой синтаксис:
find [папка] [параметры] критерий шаблон [действие]
Папка — каталог в котором будем искать
Параметры — дополнительные параметры, например, глубина поиска, и т д
Критерий — по какому критерию будем искать: имя, дата создания, права, владелец и т д.
Шаблон — непосредственно значение по которому будем отбирать файлы.
Основные параметры команды find
Я не буду перечислять здесь все параметры, рассмотрим только самые полезные.
- -P — никогда не открывать символические ссылки.
- -L — получает информацию о файлах по символическим ссылкам. Важно для дальнейшей обработки, чтобы обрабатывалась не ссылка, а сам файл.
- -maxdepth — максимальная глубина поиска по подкаталогам, для поиска только в текущем каталоге установите 1.
- -depth — искать сначала в текущем каталоге, а потом в подкаталогах.
- -mount искать файлы только в этой файловой системе.
- -version — показать версию утилиты find.
- -print — выводить полные имена файлов.
- -type f — искать только файлы.
- -type d — поиск папки в Linux.
Критерии
Критериев у команды find в Linux очень много, и мы опять же рассмотрим только основные.
- -name — поиск файлов по имени.
- -perm — поиск файлов в Linux по режиму доступа.
- -user — поиск файлов по владельцу.
- -group — поиск по группе.
- -mtime — поиск по времени модификации файла.
- -atime — поиск файлов по дате последнего чтения.
- -nogroup — поиск файлов, не принадлежащих ни одной группе.
- -nouser — поиск файлов без владельцев.
- -newer — найти файлы новее чем указанный.
- -size — поиск файлов в Linux по их размеру.
Примеры использования
А теперь давайте рассмотрим примеры find, чтобы вы лучше поняли, как использовать эту утилиту.
1. Поиск всех файлов
Показать все файлы в текущей директории:
find
find .
find . -print
Все три команды покажут одинаковый результат. Точка здесь означает текущую папку. Вместо неё можно указать любую другую.
2. Поиск файлов в определенной папке
Показать все файлы в указанной директории:
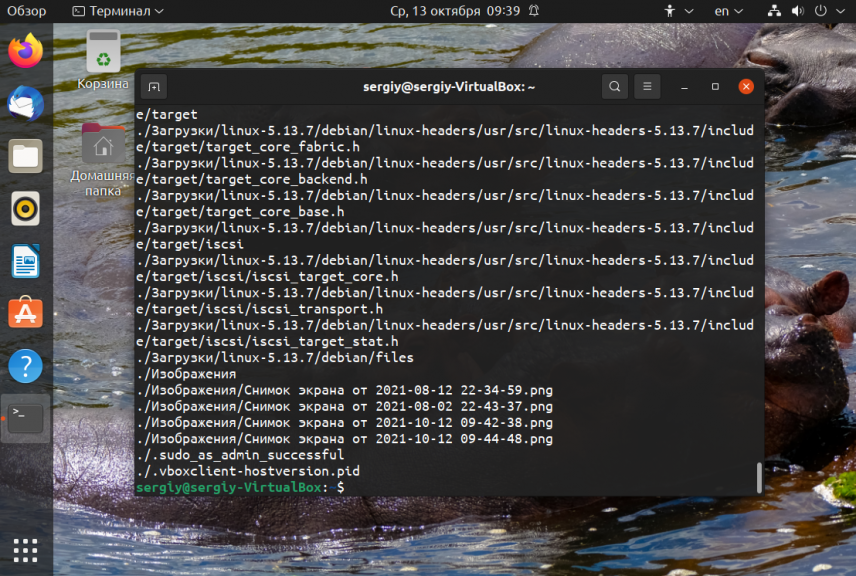
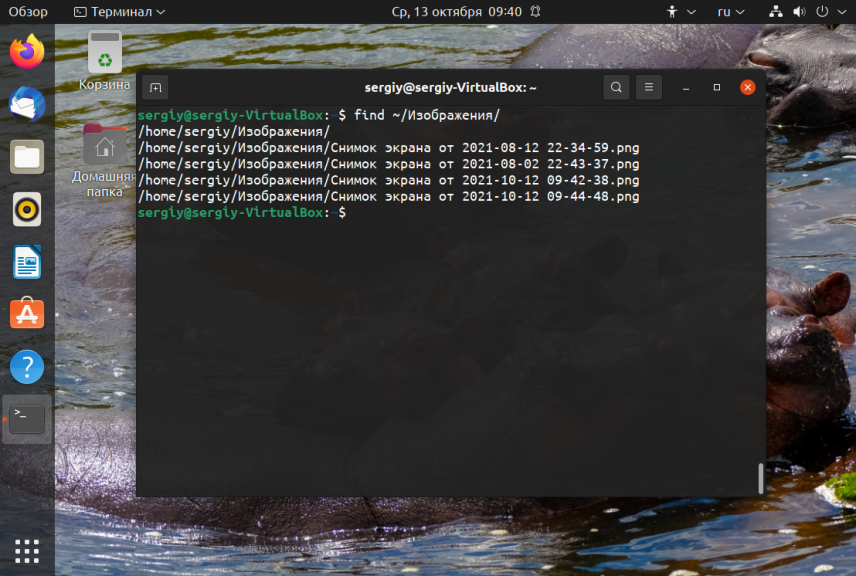
find ./Изображения
Искать файлы по имени в текущей папке:
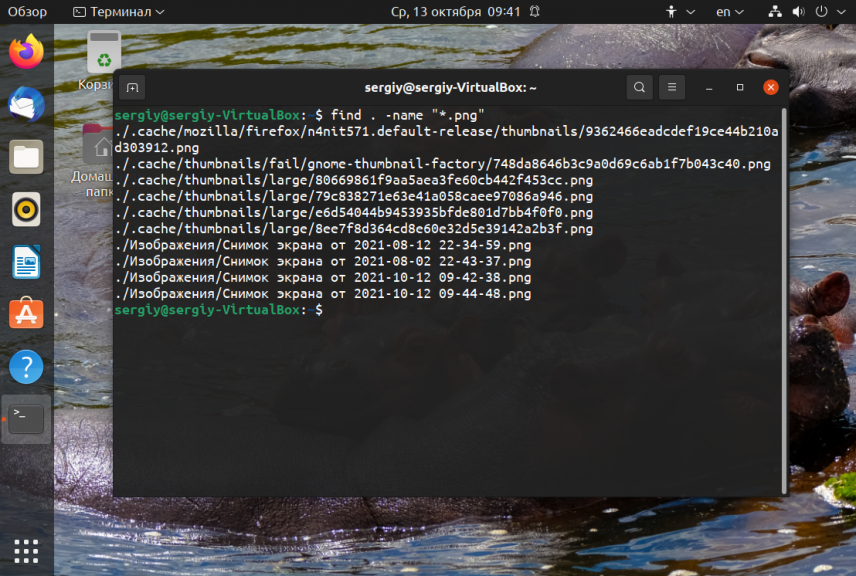
find . -name "*.png
Поиск по имени в текущей папке:
find . -name "testfile*"
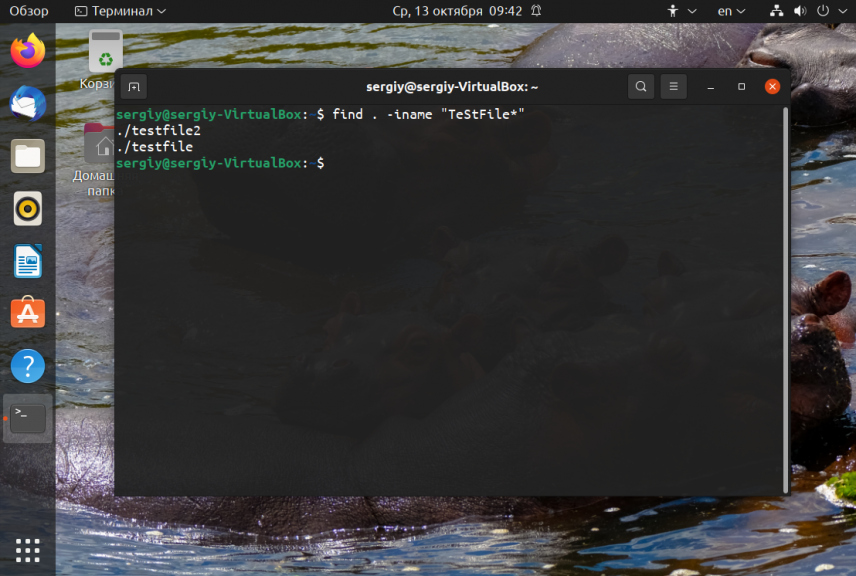
Не учитывать регистр при поиске по имени:
find . -iname "TeStFile*"
3. Ограничение глубины поиска
Поиска файлов по имени в Linux только в этой папке:
find . -maxdepth 1 -name "*.php"
4. Инвертирование шаблона
Найти файлы, которые не соответствуют шаблону:
find . -not -name "test*"
5. Несколько критериев
Поиск командой find в Linux по нескольким критериям, с оператором исключения:
find . -name "test" -not -name "*.php"
Найдет все файлы, начинающиеся на test, но без расширения php. А теперь рассмотрим оператор ИЛИ:
find -name "*.html" -o -name "*.php"
Эта команда найдёт как php, так и html файлы.
6. Тип файла
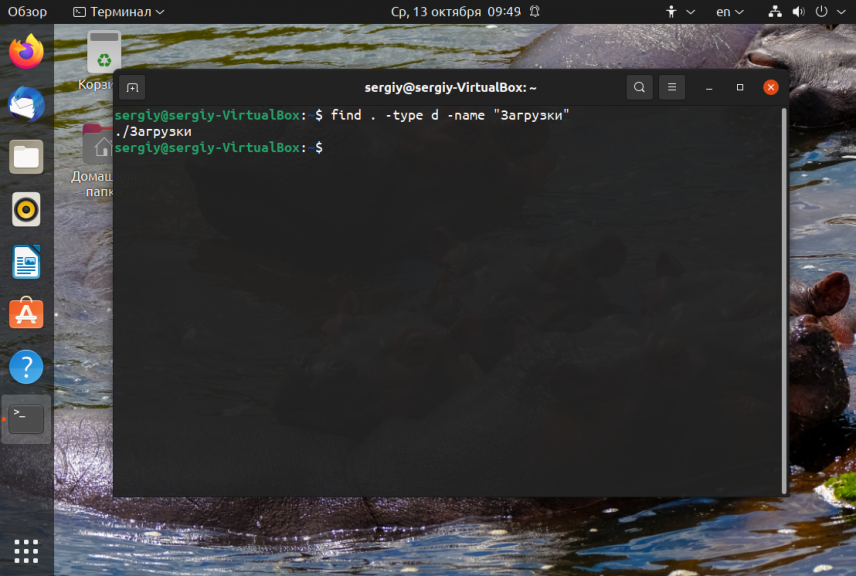
По умолчанию find ищет как каталоги, так и файлы. Если вам необходимо найти только каталоги используйте критерий type с параметром d. Например:
find . -type d -name "Загрузки"
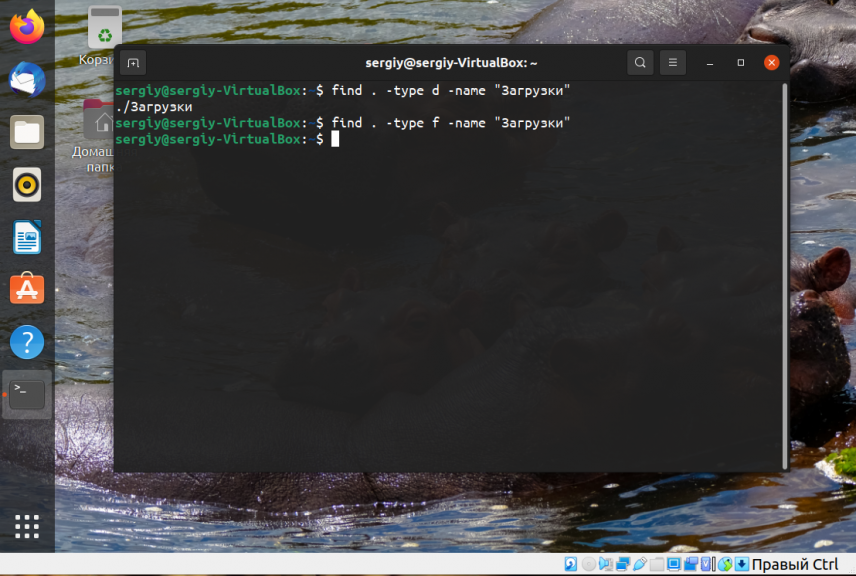
Для поиска только файлов необходимо использовать параметр f:
find . -type f -name "Загрузки"
6. Несколько каталогов
Искать в двух каталогах одновременно:
find ./test ./test2 -type f -name "*.c"
7. Поиск скрытых файлов
Найти скрытые файлы только в текущей папке. Имена скрытых файлов в Linux начинаются с точки:
find . -maxdepth 1 -type f -name ".*"

8. Поиск по разрешениям
Найти файлы с определенной маской прав, например, 0664:
find . -type f -perm 0664
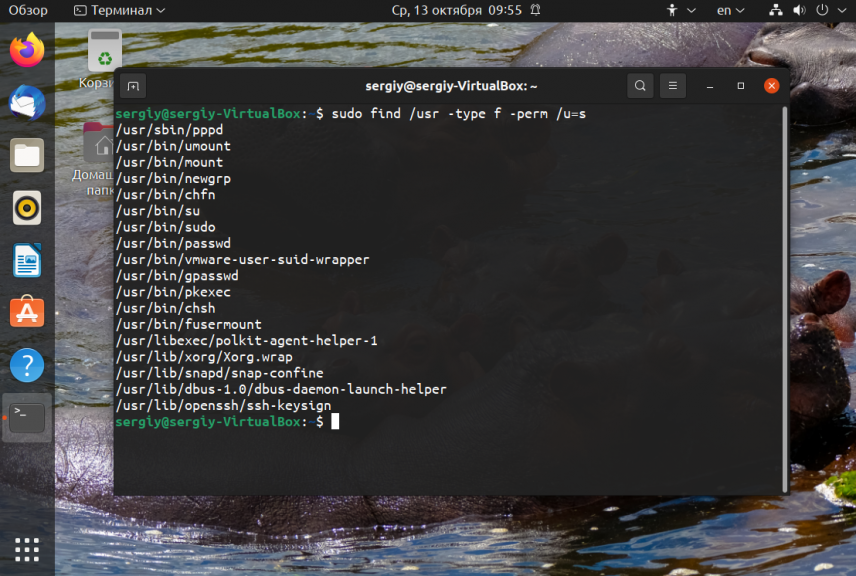
Права также можно задавать буквами для u (user) g (group) и o (other). Например, для того чтобы найти все файлы с установленным флагом Suid в каталоге /usr выполните:
sudo find /usr -type f -perm /u=s
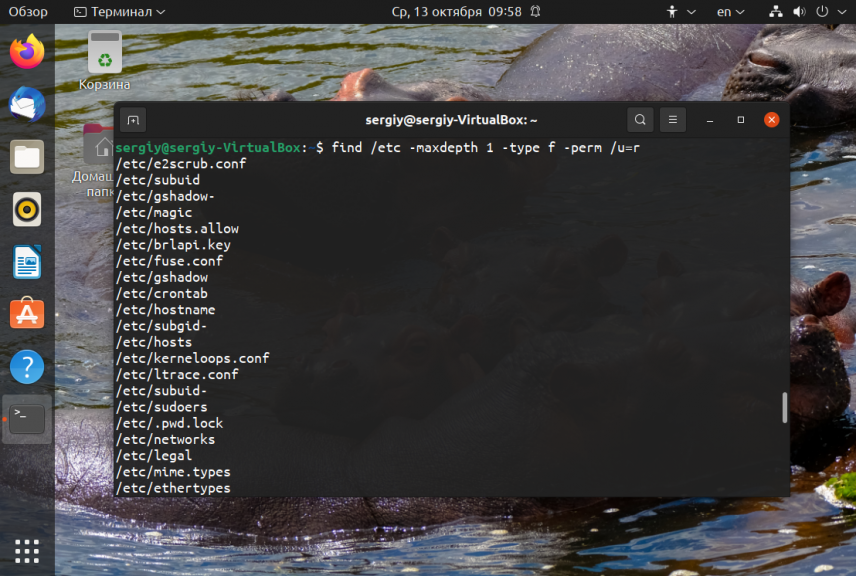
Поиск файлов доступных владельцу только для чтения только в каталоге /etc:
find /etc -maxdepth 1 -perm /u=r
Найти только исполняемые файлы:
find /bin -maxdepth 2 -perm /a=x
9. Поиск файлов в группах и пользователях
Найти все файлы, принадлежащие пользователю:
find . -user sergiy
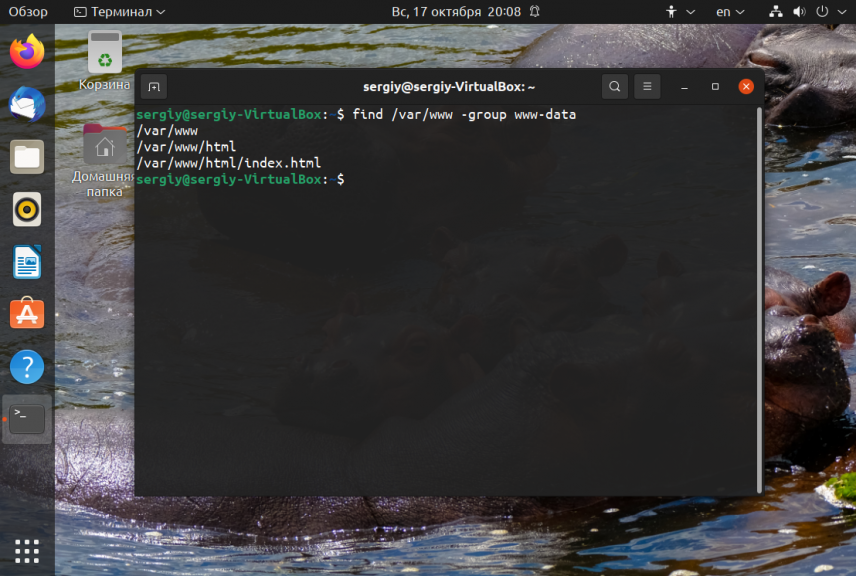
Поиск файлов в Linux принадлежащих группе:
find /var/www -group www-data
10. Поиск по дате модификации
Поиск файлов по дате в Linux осуществляется с помощью параметра mtime. Найти все файлы модифицированные 50 дней назад:
find / -mtime 50
Поиск файлов в Linux открытых N дней назад:
find / -atime 50
Найти все файлы, модифицированные между 50 и 100 дней назад:
find / -mtime +50 -mtime -100
Найти файлы измененные в течении часа:
find . -cmin 60
11. Поиск файлов по размеру
Найти все файлы размером 50 мегабайт:
find / -size 50M
От пятидесяти до ста мегабайт:
find / -size +50M -size -100M
Найти самые маленькие файлы:
find . -type f -exec ls -s {} ; | sort -n -r | head -5
Самые большие:
find . -type f -exec ls -s {} ; | sort -n | head -5
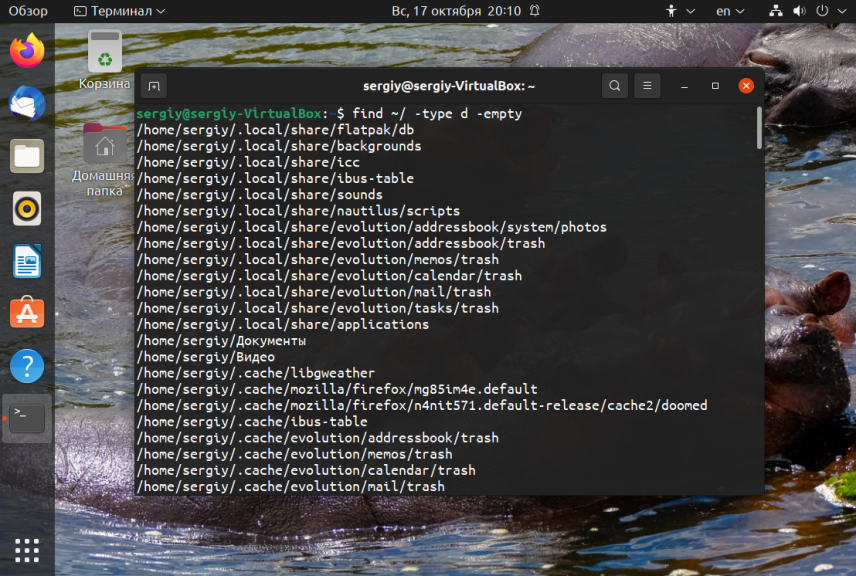
12. Поиск пустых файлов и папок
find /tmp -type f -empty
find ~/ -type d -empty
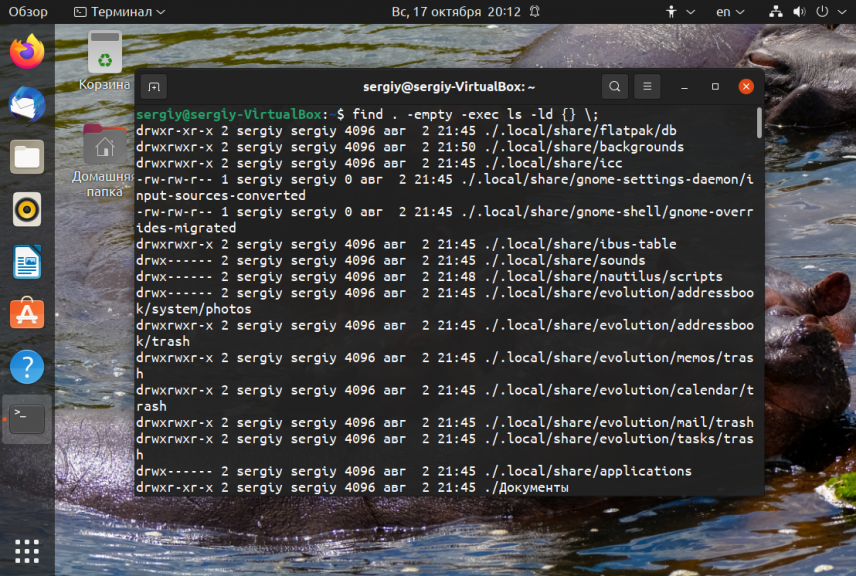
13. Действия с найденными файлами
Для выполнения произвольных команд для найденных файлов используется опция -exec. Например, для того чтобы найти все пустые папки и файлы, а затем выполнить ls для получения подробной информации о каждом файле используйте:
find . -empty -exec ls -ld {} ;
Удалить все текстовые файлы в tmp
find /tmp -type f -name "*.txt" -exec rm -f {} ;
Удалить все файлы больше 100 мегабайт:
find /home/bob/dir -type f -name *.log -size +100M -exec rm -f {} ;
Выводы
Вот и подошла к концу эта небольшая статья, в которой была рассмотрена команда find. Как видите, это одна из наиболее важных команд терминала Linux, позволяющая очень легко получить список нужных файлов. Ее желательно знать всем системным администраторам. Если вам нужно искать именно по содержимому файлов, то лучше использовать команду grep.
Обнаружили ошибку в тексте? Сообщите мне об этом. Выделите текст с ошибкой и нажмите Ctrl+Enter.
Время на прочтение
5 мин
Количество просмотров 125K

Иногда критически важно быстро найти нужный файл или информацию в системе. Порой можно ограничиться стандартами функциями поиска, которыми сейчас обладает любой файловый менеджер, но с возможностями терминала им не сравниться.
Команда find – это невероятно мощный инструмент, позволяющий искать файлы не только по названию, но и по:
- Дате добавления.
- Содержимому.
- Регулярным выражениям.
Данная команда будет очень полезна системным администраторам для:
- Управления дисковым пространством.
- Бэкапа.
- Различных операций с файлами.
Команда find в Linux производит поиск файлов и папок на основе заданных вами критериев и позволяет выполнять действия с результатами поиска.
Синтаксис команды find:
$ find directory-to-search criteria actionГде:
- directory-to-search (каталог поиска) – это отправной каталог, с которой find начинает поиск файлов по всем подкаталогам, которые находятся внутри. Если не указать путь, тогда поиск начнется в текущем каталоге;
- criteria (критерий) – критерий, по которым нужно искать файлы;
- action (действие) – что делать с каждым найденным файлом, соответствующим критериям.
Поиск по имени
Следующая команда ищет файл s.txt в текущем каталоге:
$ find . -name "s.txt"
./s.txt
Где:
- . (точка) – файл относится к нынешнему каталогу
- -name – критерии по которым осуществляется поиск. В данном случае поиск по названию файла.
В данном случае критерий -name учитывает только символы нижнего регистра и файл S.txt не появиться в результатах поиска. Чтобы убрать чувствительность к регистру необходимо использовать –iname.
$ find . -iname "s.txt"
./s.txt
./S.txt
Для поиска всех изображений c расширением .png нужно использовать шаблон подстановки *.png:
$ find . -name "*.png"
./babutafb.png
./babutafacebook.png
./Moodle2.png
./moodle.png
./moodle/moodle1.png
./genxfacebook.png
Можно использовать название каталога для поиска. Например, чтобы с помощью команды find найти все png изображения в каталоге home:
$ find /home -name "*.png"
find: `/home/babuta/.ssh': Permission denied
/home/vagrant/Moodle2.png
/home/vagrant/moodle.png
/home/tisha/hello.png
find: `/home/tisha/testfiles': Permission denied
find: `/home/tisha/data': Permission denied
/home/tisha/water.png
find: `/home/tisha/.cache': Permission denied
Если выдает слишком много ошибок в отказе разрешения, тогда можно добавить в конец команды – 2> /dev/null. Таким образом сообщения об ошибках будут перенаправляться по пути dev/null, что обеспечит более чистую выдачу.
find /home -name "*.jpg" 2>/dev/null
/home/vagrant/Moodle2.jpg
/home/vagrant/moodle.jpg
/home/tisha/hello.jpg
/home/tisha/water.jpg
Поиск по типу файла
Критерий -type позволяет искать файлы по типу, которые бывают следующих видов:
- f – простые файлы;
- d – каталоги;
- l – символические ссылки;
- b – блочные устройства (dev);
- c – символьные устройства (dev);
- p – именованные каналы;
- s – сокеты;
Например, указав критерий -type d будут перечислены только каталоги:
$ find . -type d
.
./.ssh
./.cache
./moodle
Поиск по размеру файла
Допустим, что вам необходимо найти все большие файлы. Для таких ситуаций подойдет критерий -size.
- «+» — Поиск файлов больше заданного размера
- «-» — Поиск файлов меньше заданного размера
- Отсутствие знака означает, что размер файлов в поиске должен полностью совпадать.
В данном случае поиск выведет все файлы более 1 Гб (+1G).
$ find . -size +1G
./Microsoft_Office_16.29.19090802_Installer.pkg
./android-studio-ide-183.5692245-mac.dmg
Единицы измерения файлов:
- c — Байт
- k — Кбайт
- M — Мбайт
- G — Гбайт
Поиск пустых файлов и каталогов
Критерий -empty позволяет найти пустые файлы и каталоги.
$ find . -empty
./.cloud-locale-test.skip
./datafiles
./b.txt
...
./.cache/motd.legal-displayed
Поиск времени изменения
Критерий -cmin позволяет искать файлы и каталоги по времени изменения. Для поиска всех файлов, измененных за последний час (менее 60 мин), нужно использовать -60:
$ find . -cmin -60
.
./a.txt
./datafiles
Таким образом можно найти все файлы в текущем каталоге, которые были созданы или изменены в течение часа (менее 60 минут).
Для поиска файлов, которые наоборот были изменены в любое время кроме последнего часа необходимо использовать +60.
$ find . -cmin +60Поиск по времени доступа
Критерий -atime позволяет искать файлы по времени последнего доступа.
$ find . -atime +180Таким образом можно найти файлы, к которым не обращались последние полгода (180 дней).
Поиск по имени пользователя
Опция –user username дает возможность поиска всех файлов и каталогов, принадлежащих конкретному пользователю:
$ find /home -user tisha 2>/dev/nullТаким образом можно найти все файлы пользователя tisha в каталоге home, а 2>/dev/null сделает выдачу чистой без ошибок в отказе доступа.
Поиск по набору разрешений
Критерий -perm – ищет файлы по определенному набору разрешений.
$ find /home -perm 777Поиск файлов с разрешениями 777.
Операторы
Для объединения нескольких критериев в одну команду поиска можно применять операторы:
- -and
- -or
- -not
Например, чтобы найти файлы размером более 1 Гбайта пользователя tisha необходимо ввести следующую команду:
$ find /home -user tisha -and -size +1G 2>/dev/nullЕсли файлы могут принадлежать не только пользователю tisha, но и пользователю pokeristo, а также быть размером более 1 Гбайта.
$ find /home ( -user pokeristo -or -user tisha ) -and -size +1G 2>/dev/nullПеред скобками нужно поставить обратный слеш «».
Действия
К команде find можно добавить действия, которые будут произведены с результатами поиска.
- -delete — Удаляет соответствующие результатам поиска файлы
- -ls — Вывод более подробных результатов поиска с:
- Размерами файлов.
- Количеством inode.
- -print Стоит по умолчанию, если не указать другое действие. Показывает полный путь к найденным файлам.
- -exec Выполняет указанную команду в каждой строке результатов поиска.
-delete
Полезен, когда необходимо найти и удалить все пустые файлы, например:
$ find . -empty -deleteПеред удалением лучше лишний раз себя подстраховать. Для этого можно запустить команду с действием по умолчанию -print.
-exec:
Данное действие является особенным и позволяет выполнить команду по вашему усмотрению в результатах поиска.
-exec command {} ;Где:
- command – это команда, которую вы желаете выполнить для результатов поиска. Например:
- rm
- mv
- cp
- {} – является результатами поиска.
- ; — Команда заканчивается точкой с запятой после обратного слеша.
С помощью –exec можно написать альтернативу команде –delete и применить ее к результатам поиска:
$ find . -empty -exec rm {} ;Другой пример использования действия -exec:
$ find . -name "*.jpg" -exec cp {} /backups/fotos ;Таким образом можно скопировать все .jpg изображения в каталог backups/fotos
Заключение
Команду find можно использовать для поиска:
- Файлов по имени.
- Дате последнего доступа.
- Дате последнего изменения.
- Имени пользователя (владельца файла).
- Имени группы.
- Размеру.
- Разрешению.
- Другим критериям.
С полученными результатами можно сразу выполнять различные действия, такие как:
- Удаление.
- Копирование.
- Перемещение в другой каталог.
Команда find может сильно облегчить жизнь системному администратору, а лучший способ овладеть ей – больше практиковаться.

 Обновлено: 01.02.2022
Опубликовано: 25.07.2016
Утилита find представляет универсальный и функциональный способ для поиска в Linux. Данная статья является шпаргалкой с описанием и примерами ее использования.
Синтаксис
Примеры
Поиск по имени
По дате
По типу файла
По правам
По содержимому
С сортировкой по дате изменения
Лимиты
Действия над найденными объектами
Запуск по расписанию в CRON
Общий синтаксис
find <где искать> <опции>
<где искать> — путь к корневому каталогу, откуда начинать поиск. Например, find /home/user — искать в соответствующем каталоге. Для текущего каталога нужно использовать точку «.».
<опции> — набор правил, по которым выполнять поиск.
* по умолчанию, поиск рекурсивный. Для поиска в конкретном каталоге можно использовать опцию maxdepth.
Описание опций
| Опция | Описание |
|---|---|
| -name | Поиск по имени. |
| -iname | Регистронезависимый поиск по имени. |
| -type |
Тип объекта поиска. Возможные варианты:
|
| -size | Размер объекта. Задается в блоках по 512 байт или просто в байтах (с символом «c»). |
| -mtime | Время изменения файла. Указывается в днях. |
| -mmin | Время изменения в минутах. |
| -atime | Время последнего обращения к объекту в днях. |
| -amin | Время последнего обращения в минутах. |
| -ctime | Последнее изменение владельца или прав на объект в днях. |
| -cmin | Последнее изменение владельца или прав в минутах. |
| -user | Поиск по владельцу. |
| -group | По группе. |
| -perm | С определенными правами доступа. |
| -depth | Поиск должен начаться не с корня, а с самого глубоко вложенного каталога. |
| -maxdepth | Максимальная глубина поиска по каталогам. -maxdepth 0 — поиск только в текущем каталоге. По умолчанию, поиск рекурсивный. |
| -prune | Исключение перечисленных каталогов. |
| -mount | Не переходить в другие файловые системы. |
| -regex | По имени с регулярным выражением. |
| -regextype <тип> | Тип регулярного выражения. |
| -L или -follow | Показывает содержимое символьных ссылок (симлинк). |
| -empty | Искать пустые каталоги. |
| -delete | Удалить найденное. |
| -ls | Вывод как ls -dgils |
| Показать найденное. | |
| -print0 | Путь к найденным объектам. |
| -exec <команда> {} ; | Выполнить команду над найденным. |
| -ok | Выдать запрос перед выполнением -exec. |
Также доступны логические операторы:
| Оператор | Описание |
|---|---|
| -a | Логическое И. Объединяем несколько критериев поиска. |
| -o | Логическое ИЛИ. Позволяем команде find выполнить поиск на основе одного из критериев поиска. |
| -not или ! | Логическое НЕ. Инвертирует критерий поиска. |
Полный набор актуальных опций можно получить командой man find.
Примеры использования find
Поиск файла по имени
1. Простой поиск по имени:
find / -name «file.txt»
* в данном примере будет выполнен поиск файла с именем file.txt по всей файловой системе, начинающейся с корня /.
2. Поиск файла по части имени:
find / -name «*.tmp»
* данной командой будет выполнен поиск всех папок или файлов в корневой директории /, заканчивающихся на .tmp
3. Несколько условий.
а) Логическое И. Например, файлы, которые начинаются на sess_ и заканчиваются на cd:
find . -name «sess_*» -a -name «*cd»
б) Логическое ИЛИ. Например, файлы, которые начинаются на sess_ или заканчиваются на cd:
find . -name «sess_*» -o -name «*cd»
в) Более компактный вид имеют регулярные выражения, например:
find . -regex ‘.*/(sess_.*cd)’
find . -regex ‘.*/(sess_.*|.*cd)’
* где в первом поиске применяется выражение, аналогичное примеру а), а во втором — б).
4. Найти все файлы, кроме .log:
find . ! -name «*.log»
* в данном примере мы воспользовались логическим оператором !.
Поиск по дате
1. Поиск файлов, которые менялись определенное количество дней назад:
find . -type f -mtime +60
* данная команда найдет файлы, которые менялись более 60 дней назад.
Или в промужутке:
find . -mmin -20 -mmin +10 -type f
* найти все файлы, которые менялись более 10 минут, но не более 20-и.
2. Поиск файлов с помощью newer. Данная опция доступна с версии 4.3.3 (посмотреть можно командой find —version).
а) дате изменения:
find . -type f -newermt «2019-11-02 00:00»
* покажет все файлы, которые менялись, начиная с 02.11.2019 00:00.
find . -type f -newermt 2019-10-31 ! -newermt 2019-11-02
* найдет все файлы, которые менялись в промежутке между 31.10.2019 и 01.11.2019 (включительно).
б) дате обращения:
find . -type f -newerat 2019-10-08
* все файлы, к которым обращались с 08.10.2019.
find . -type f -newerat 2019-10-01 ! -newerat 2019-11-01
* все файлы, к которым обращались в октябре.
в) дате создания:
find . -type f -newerct 2019-09-07
* все файлы, созданные с 07 сентября 2019 года.
find . -type f -newerct 2019-09-07 ! -newerct «2019-09-09 07:50:00»
* файлы, созданные с 07.09.2019 00:00:00 по 09.09.2019 07:50
По типу
Искать в текущей директории и всех ее подпапках только файлы:
find . -type f
* f — искать только файлы.
Поиск по правам доступа
1. Ищем все справами на чтение и запись:
find / -perm 0666
2. Находим файлы, доступ к которым имеет только владелец:
find / -perm 0600
Поиск файла по содержимому
find / -type f -exec grep -i -H «content» {} ;
* в данном примере выполнен рекурсивный поиск всех файлов в директории / и выведен список тех, в которых содержится строка content.
С сортировкой по дате модификации
find /data -type f -printf ‘%TY-%Tm-%Td %TT %pn’ | sort -r
* команда найдет все файлы в каталоге /data, добавит к имени дату модификации и отсортирует данные по имени. В итоге получаем, что файлы будут идти в порядке их изменения.
Лимит на количество выводимых результатов
Самый распространенный пример — вывести один файл, который последний раз был модифицирован. Берем пример с сортировкой и добавляем следующее:
find /data -type f -printf ‘%TY-%Tm-%Td %TT %pn’ | sort -r | head -n 1
Поиск с действием (exec)
1. Найти только файлы, которые начинаются на sess_ и удалить их:
find . -name «sess_*» -type f -print -exec rm {} ;
* -print использовать не обязательно, но он покажет все, что будет удаляться, поэтому данную опцию удобно использовать, когда команда выполняется вручную.
2. Переименовать найденные файлы:
find . -name «sess_*» -type f -exec mv {} new_name ;
или:
find . -name «sess_*» -type f | xargs -I ‘{}’ mv {} new_name
3. Переместить найденные файлы:
find . -name «sess_*» -type f -exec mv {} /new/path/ ;
* в данном примере мы переместим все найденные файлы в каталог /new/path/.
4. Вывести на экран количество найденных файлов и папок, которые заканчиваются на .tmp:
find . -name «*.tmp» | wc -l
5. Изменить права:
find /home/user/* -type d -exec chmod 2700 {} ;
* в данном примере мы ищем все каталоги (type d) в директории /home/user и ставим для них права 2700.
6. Передать найденные файлы конвееру (pipe):
find /etc -name ‘*.conf’ -follow -type f -exec cat {} ; | grep ‘test’
* в данном примере мы использовали find для поиска строки test в файлах, которые находятся в каталоге /etc, и название которых заканчивается на .conf. Для этого мы передали список найденных файлов команде grep, которая уже и выполнила поиск по содержимому данных файлов.
7. Произвести замену в файлах с помощью команды sed:
find /opt/project -type f -exec sed -i -e «s/test/production/g» {} ;
* находим все файлы в каталоге /opt/project и меняем их содержимое с test на production.
Чистка по расписанию
Команду find удобно использовать для автоматического удаления устаревших файлов.
Открываем на редактирование задания cron:
crontab -e
И добавляем:
0 0 * * * /bin/find /tmp -mtime +14 -exec rm {} ;
* в данном примере мы удаляем все файлы и папки из каталога /tmp, которые старше 14 дней. Задание запускается каждый день в 00:00.
* полный путь к исполняемому файлу find смотрим командой which find — в разных UNIX системах он может располагаться в разных местах.
Have you ever felt frustrated searching for files manually on your computer? If you’re a developer or DevOps engineer working on GUI-less Linux servers, it’ll be hard navigating back and forth to find files.
Many people are unaware of the power of Linux terminals. Linux has an incredibly powerful command line that allows you to search files and directories in a fraction of a second.
Whether you’re a beginner or an expert, and if you’re looking to take your file management skills to the next level, you’ve arrived at the right spot. This article will help you understand the basics of the most commonly used find command in Linux.
What is the find Command in Linux?
The find command allows you to search for files and directories on your computer. It adds the flexibility to search for files in a specific directory or recursively through all sub-directories.
Let’s explore the power of the find command
How to Search a File by Name
Let’s say you saved a file called hello_world.html somewhere and you don’t even remember the directory name. But your boss is asking you to send them the file immediately.
Usually, if you forgot where you stored a file, you’d begin by going through folder after folder and checking if the file exists.
This is when the find command does a great job. Instead of searching the file manually on your computer, you can use the find command to automate the process.
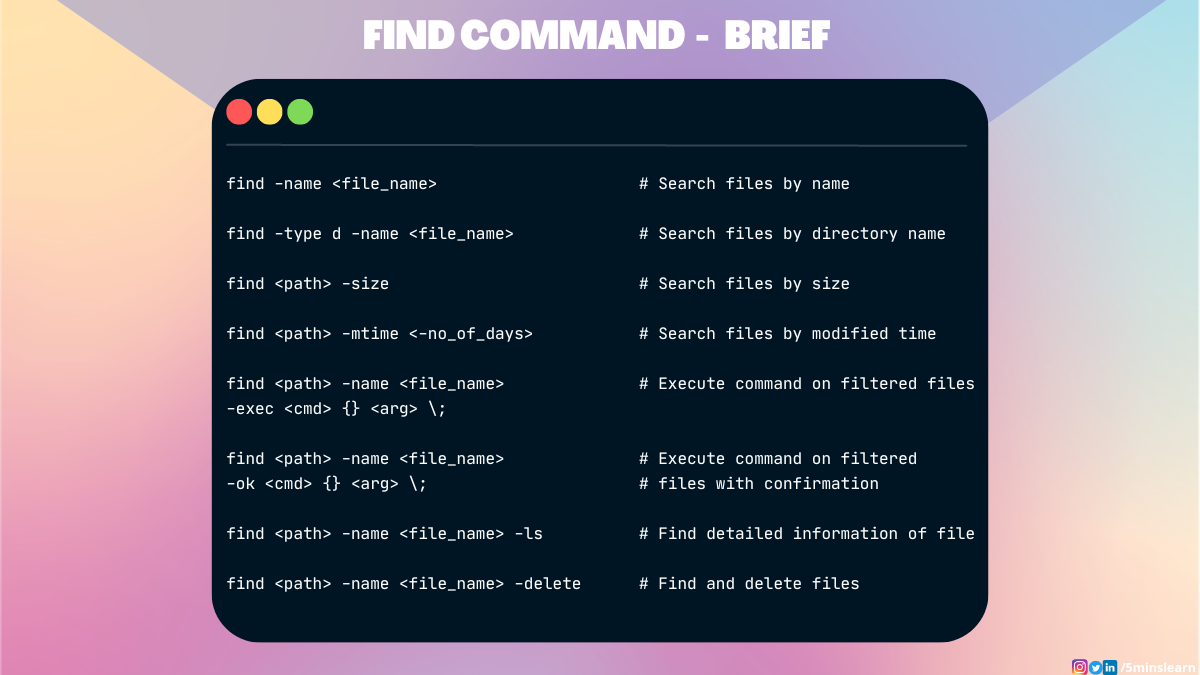
By passing the name of the file using the -name flag, the find command searches and returns the location of the file.
find -name <file_name>find command syntax to search a file by name
But remember the -name flag performs a case-sensitive search. If you are looking to do a case-insensitive search, you can use the -iname flag instead.
find -iname <file_name>find command syntax to do a case-insensitive search
You can also use the find command as an alternative to the ls command in some places. Let’s assume you need to find all the files ending with the .txt extension. You can do so with the find command using the regex pattern (*.txt).
find /path/to/search -name "*.txt"find command to search files matching a pattern
This command will list all the .txt files in your current directory and its sub-directories.
To find .txt files in a particular directory and sub-directory, you can replace the /path/to/search with the path of your directory.
How to Find a Directory in Linux
Searching for a directory is possible by passing the d to the -type parameter in the find command.
find /path/to/search -type dfind command syntax to find a directory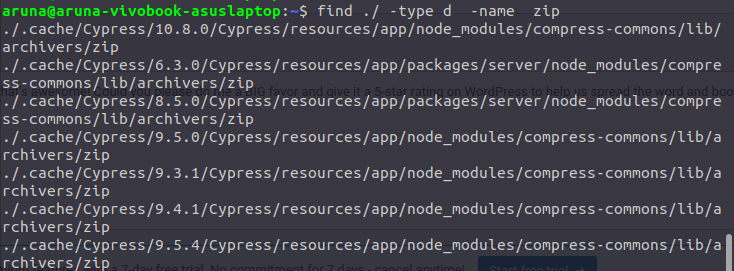
find commandIn the above screenshot, we’re finding a directory named zip from our current directory.
Similarly the -type option accepts other parameter options to simplify our finding process.
ffinds the list of regular filesbfinds the list of block devicescfinds the list of character deviceslfinds the list of symbolic linkssfinds the list of socketspfinds the named pipes
How to Search a File by Size in Linux
Adding the -size option along with the find command helps you find files based on size. Prepend a + or - to the size to represent greater than and less than, respectively.
find /path/to/search -size <size_of_the_file>find command syntax to search files by size
In the above screenshot, we’re finding all the files that have a size greater than 1 GB.
You can also search for all files that fall within a specific size range.
For example, if you want to find all the files that are above 50 MB and below 100 MB, you can run the following command:
find /path/to/search -size +50M -size -100Mfind command syntax to search files within a range of size
You can specify the size in your preferred notation. A few of the available notations are:
- K represents KB
- M represents MB
- G represents GB
- b represents bytes
- c represents blocks
How to Search a File Based on Time Modified
Every file has a created and last updated time associated with it. Let’s assume you have thousands of files in your directory. You edited a file in the past couple of days and forgot its name. You’re sure that you have edited only a couple of files after that.
In such cases, you can find all the files that were modified within the past 7 days. This limits your search from 1000+ files to a more manageable amount. You’ll be able to find the file you edited in seconds after running the command.
This is possible by passing -mtime parameter with the find command.
find /path/to/search -mtime <-number_of_days_ago>find command syntax to search files modified within a certain days
Let’s assume another scenario, where today’s date is February 10, 2023. You modified a file before Feb 3, 2023. After Feb 3, 2023, you modified a lot of files. You have to find the file which you modified before Feb 3, 2023. So, basically, you need the files that were modified before Feb 3, 2023.
Strange scenario, right?
But, you can also run this query using the find command. You can achieve this by exchanging the negative sign (-) with the positive sign (+).
Here’s the modified command for you:
find /path/to/search -mtime +7find command syntax to search files modified before certain daysHow to Execute a Command on Files Filtered from the find Command
This question may confuse you. Before revealing the answer, let’s understand the question clearly with a real scenario.
Let’s assume you have 1000 files in a directory, and running the find command returns 20 matching files. You want to move these 20 files into a different directory. How can you achieve that?
Simply put, we have to run a command over each of the filtered files.
You can do this by passing the -exec option with the find command.
The -exec option executes a command on each file that is found in the search. The -exec option is followed by a command and its arguments, with the {} symbols representing the path of the file being processed.
To represent the end of the -exec command, we have to add ; (a backward slash and a semi-colon).
Here’s the syntax:
find /path/to/search -name -exec {} ;find command syntax to execute an operation on the filtered filesLet’s try to move the filtered files from the 5minslearn directory to the zip directory.
Here’s the command:
find ./5minslearn -name "*.zip" -exec mv {} ./5minslearn/zip ;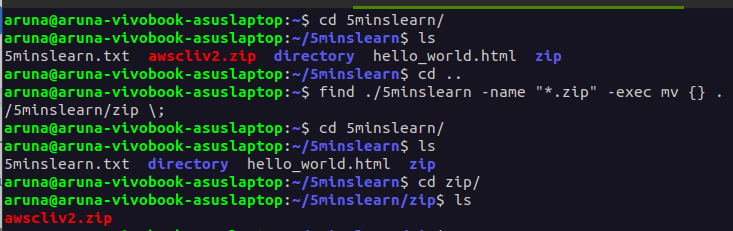
This command searches for all files ending with a .zip in the ./5minslearn directory and then moves each file to the ./5minslearn/zip directory.
The -exec option allows you to perform a wide range of operations on the files that are found. You can replace the move command from the above example by copying, deleting, or even changing the file permission command.
How to Execute a Command on Files Filtered with a Confirmation
Most people will prefer to use this if they’re not sure about whether to apply the operation on each file.
The -ok option is similar to the -exec option except that it will ask for confirmation before executing the operation on each file. This command is super helpful to review files that will be affected before executing the specific operation. You also have the option to decline if you’re not sure or don’t wish to apply the command.
For example, this time let’s try to move the .txt files to the other directory.
find /path/to/search -name "*.txt" -ok mv {} /path/to/destination ;find command syntax to confirm before running an operation on the filtered files
The above command searches for all files with a .txt extension in the ./5minslearn directory and then prompts the user to confirm before moving each file to the ./5minslearn/text_files directory.
To approve the operation, enter yes and no to decline the operation and skip to the next file.
The -ok option is useful when you want to be cautious about the files you are modifying, as it allows you to inspect each file and its location before executing the specified command.
How to Find a File with Detailed Information
The -ls option in the find command is used to display information about the files found in the search, in the format of the ls command. This option provides detailed information about the files, such as their permissions, owner, size, and last modified time.
find /path/to/search -name "*.<file-extension>" -lsfind command syntax to list files in ls command format
ls command formatHow to Find and Remove Files
Have you ever needed to find files and remove them from your computer? The -delete option in the find command does this for you. It allows you to delete files that match the specified criteria.
find . -name "*.<extension>" -delete
In the above example, you can see that the find command deleted the files with the .html extension
Note: This operation is irreversible. Be 100% sure when you run the delete operation.
I would advise running the find command without the -delete flag at first and ensure that only the files that need to be deleted are shown. Once you’re sure, you can execute the same command appending -delete flag.
Conclusion
In this article, you learned how to search files effectively using your Linux terminal.
These are very basic options in the find command that I think every developer should know. I believe mastering the fundamentals is the first step to becoming more advanced with Linux. I’ve been covering basics in all my blogs to help you create a solid foundation.
To learn more about Linux, subscribe to my email newsletter on my site and follow me on social media.
Learn to code for free. freeCodeCamp’s open source curriculum has helped more than 40,000 people get jobs as developers. Get started